
When it comes to making decadent espresso shots, there are many tools and appliances that can do the job. Depending on your budget and level of expertise, you can spend anywhere from just a couple of bucks to tens of thousands of dollars on a coffee machine.
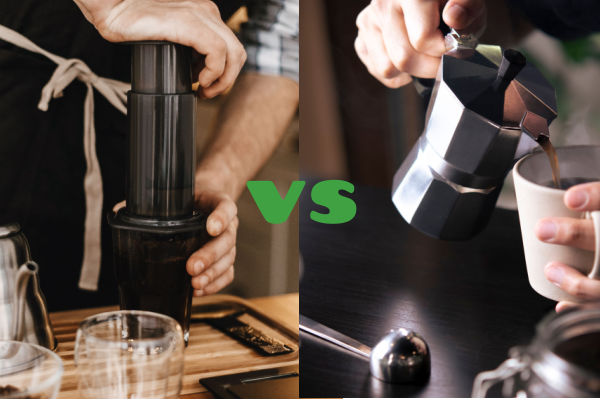
For those who are just beginning to dabble in the art of espresso making or for those on a strict budget who can’t afford a fancy machine, there are alternatives tools you can use. Although the result might not be the same quality as an espresso from an over-the-top machine, it’s comparable. In this article, we are going to explore Aeropress coffee makers and moka pots to see if one makes a meaner espresso than the other. We’ll give you a hint- Aeropress has a lot to offer! Aside from comparing espresso shots, we will also dive into coffee quality, brewing versatility, ease of use, cleaning and maintenance, and brew speed for each of these coffee makers.
Aeropress Basics
An Aeropress coffee maker is a basic tool that is easy to understand. There are also only a few pieces, including the cylindrical chamber and cap, plunger, micro-filters and filter holder, stirrer, and a coffee scoop.
The Aeropress is an American-made product that, when ordered directly through the company, comes with a one-year warranty. It can make up to three espresso shots in one press and can be used to brew other coffee beverages.
The cap and plunger seal are silicone, and the filters are made from paper. All the other components of the Aeropress are made of food-safe polypropylene, which is BPA- and phthalate-free.
Brewing Espresso- It’s Easy!
There are a few simple steps to brewing an espresso concentration with an Aeropress. Before you get started, be sure to heat up some water. It should be around 175° F. when brewing hot coffee. (If you are brewing a cold brew, room temperature water is fine.)
- Remove the plunger and cap from the chamber.
- Place a micro-filter into the cap.
- Twist the cap back onto the chamber. Then, stand the chamber up on top of a coffee mug, with the cap facing down. (The other side of the chamber that is facing up should be open.)
- Dump one rounded scoop of coffee into the chamber. The coffee should be ground to a medium-fine consistency.
- Pick up the chamber and gently shake it to level the coffee grounds. Then, place the chamber back onto the coffee mug.
- Pour your water into the chamber until it reaches the number 2 that is marked on the side.
- Stir the coffee and water mixture.
- Place the plunger inside the chamber and gently press down until you feel resistance. Continue pressing down gently until the bottom of the plunger reaches the coffee grounds.
- Enjoy your espresso!
Brew Speed & Quality
From start to finish, not including the time it takes to heat up your water, brewing an espresso concentration with an Aeropress takes about 1 minute. Where a traditional espresso machine needs 9 bars of pressure to create an espresso, the Aeropress can only produce somewhere between .35 to .75 bars of pressure.
If you brew an espresso concentration with an Aeropress and expect it to taste like a professional espresso that you might find at a coffee shop, you will be disappointed. With that being said, the concentrated shot of coffee that Aeropress brews is rich and smooth. Since it uses a micro-filter, it also stops coffee grounds from leaking into your cup and removes acidity and bitterness.
Brewing Versatility
After brewing the espresso concentration, you can add 8 oz of hot water to the mug to achieve a regular cup of coffee. If you are craving a latte, you switch out the 8 oz of hot water for 8 oz of steamed milk. Even still, if you are craving cold or iced coffee, simply add 8 oz of room temperature or iced water to the initial brew.
Brewing with an Aeropress also gives you control over the water to coffee rations, how long the coffee is stirred before being pressed, and what pressure is being applied to the plunger.
Cleaning & Maintenance
For basic cleaning, simply remove the Aeropress from the coffee mug after a brew, twist off the filter cap, and push the plunger all the way through the chamber to rid of the coffee grounds. This helps remove any coffee grounds that may be trapped in the chamber and expels them out the bottom. Cleaning is quick and easy!
You can also give the chamber a quick rise or run it through the dishwasher when needed. The seal is also removable and should be washed with dish soap.
Moka Pot Basics
Moka pots are an excellent choice for people who want to experience an espresso-like coffee. There is a boiler that holds the water, which sits on the stove when the coffee is brewing. The boiler also has a safety valve to make sure too much pressure doesn’t build up with the coffee brews.
The ground coffee is placed in the funnel tank, which is then placed inside the boiler. A rubber gasket is placed on top of the funnel tank. This stops water and steam from escaping out the sides. A filter plate is also used on top of the gasket to keep the ground coffee in the funnel tank.
Lastly, a kettle secures to the top of the boiler. This compartment is where the brewed coffee is ultimately expelled. The kettle also has a spout and handle for easy and safe serving.
Brewing Espresso- It’s Challenging!
Making espresso with a moka pot isn’t easy. This is because true espresso is made with lots of pressure. This appliance can only produce anywhere from 14 to 22 pounds of pressure. As a result, the coffee that is brewed isn’t an actual espresso.
A moka pot can brew a strong cup of coffee in as little as five minutes (and up to ten minutes). Unlike Aeropress, it can create anywhere from 1 to 1.5 bars of pressure. This is still far away, however, from the 8 to 10 bars of pressure needed to brew a true espresso shot.
The coffee that is brewed, however, is strong like that of an espresso. The taste is often described as smooth and bold.
Brewing Versatility
Although you have no control over the amount of pressure in a moka pot as you do with an Aeropress, you can still control the water and coffee ratio. This flexibility will allow you to play around with ratios until the desired outcome is achieved.
Cleaning & Maintenance
When compared to an Aeropress, cleaning a moka pot is more time-intensive and can be slightly more challenging. For example, coffee grounds can build up near the safety value. This means routine cleaning and inspections, whereas the Aeropress is quick and simple to clean and maintain.
If the moka pot is aluminum, a material that is more susceptible to corrosion and rust, a simple rinse under water is all that is necessary to keep it clean. In fact, cleaning the moka pot with soap or using a dishwasher could cause surface damage to the appliance. It could also alter the taste of coffee in later brews.
Clear Winner?
Neither of these two tools brew a true espresso. With that being said, both brew a strong espresso-like beverage. Ultimately, the Aeropress offers quicker brewing times and easier cleaning and maintenance. Don’t completely dismiss the moka pot, however, as it too brews a strong and flavorful beverage that can be personalized to your liking. When it comes down to it, they are both on the same playing field…far away from an espresso machine.