
Keurig machines are a beloved appliance for coffee drinkers everywhere. This famous brewer is ideal for those who prefer single-cup brewing options, and take away the worry of wasting a full pot of coffee. You can count on your Keurig as a simple, user-friendly device, but like all appliances, issues can happen.
If your Keurig is leaking, don’t panic or immediately hop online to buy a new one. The Keurig company and the internet have come up with plenty of techniques that can fix this common problem and keep your device going for years.
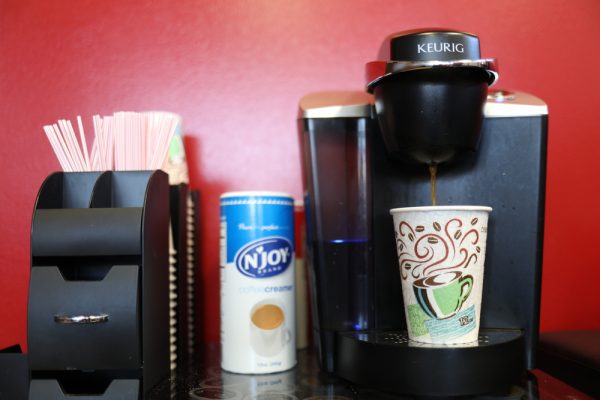
How Does a Keurig Machine Work?
The Keurig company has released several models over the years, but the fundamentals remain the same. The Keurig brewing process only requires the machine and the branded K-Cups to get your morning coffee.
The appliance works by the user inserting a K-Cup into the chamber. The Keurig machine contains needles that puncture the top and the bottom of the K-Cup, allowing water to flow through. Then, simply press a button, and water is pumped from the cold-water reservoir into the heating chamber and run through the grounds in the K-Cup, brewing your perfect morning beverage.
Keurig Leak from the Bottom of the Device
A Keurig leak is a common problem that could have a number of possible fixes. The first step is making sure you know where the leak is coming from. A leak from the top of the machine or coffee leaking from the machine instead of water could indicate a different kind of problem.
Once you have determined that the leak is coming from the bottom of the machine rather than the top, a couple of options are the most likely causes of the damage.
When Does the Keurig Leak?
Figuring out when your device leaks can help narrow down your options for targeting the issue. If the device only leaks when brewing, the problem can be simply overfilling the device or a clogged machine. More complex possibilities include a loose or broken upper gasket and a broken valve or hose inside the machine.
If your device constantly leaks, the issue could be with the cold water reservoir or the O-ring.
First, Descale the Machine
The Keurig should be descaled every three months, so start by descaling the machine. Run through the brew cycle with a descaling solution first, then again with water. This is the most common cause of problems with a Keurig, and often the simplest solution is the answer. Save yourself the headache and expense of jumping to more complicated answers by trying this quick fix first.
The O-Ring is Bad
The O-Ring is a silicone ring that seals the bottom of the water tank. It is located where the water tank connects to the hose. Over time, this small device can wear down, losing the adhesive or developing cracks.
To check and fix the O-Ring, follow these steps:
- Check for the O-Ring: First, you want to make sure the O-Ring hasn’t fallen off or gotten lost. If missing, you can get a new one from the Keurig website. Just make sure you select the correct model.
- Check the position of the O-Ring: The O-Ring should sit snugly against the bottom of the water tank. You can push it back into place with your fingers if it has fallen loose.
- Check for cracks in the O-Ring: Check along the silicone ring for any damage or cracks that can let water through. If your O-Ring is cracked, you can purchase a replacement through the Keurig website.
You can also try restoring the seal if there is only minor damage by wiping it down using vinegar solution and Silicone grease. This may fix the leak for an O-Ring that is only a little worn out or slightly damaged.
The Water Tank is Cracked
If the O-Ring is not the source of the problem, the next place to check is the water tank. To check if your water tank is cracked, remove it and inspect it. You should be able to see or feel cracks in the plastic.
If you don’t see or feel any cracks, you can also check with water. Feel on the bottom of the tank for wetness. Fill the tank with water and hold it over the sink for a minute or two to watch for leaks. If you don’t see any visible cracks, the leak may take a minute to become visible for a crack so small.
Unfortunately there is no quick hack to repair a broken water reservoir. If your water tank is cracked, you’ll need a new one. The Keurig website offers replacement water reservoirs for purchase. Just make sure the model matches your own or it won’t fit on your machine.
Internal Complications
If you’ve run through the other options and are still having trouble, you probably have an issue with an internal piece of the Keurig. If an internal piece of machinery, such as a gasket or valve, is the source of the leaking, it may be time to buy a new device.
Some manufacturers can repair these issues, but they are likely a little too complex for the average home repair. Repairs may also rival the price of replacing the machine so take that into consideration when choosing your next step.
Summary
A Keurig device is a straightforward machine for any coffee lover that can last up to five years, given the proper maintenance. When your appliance experiences technical malfunctions, easy fixes can keep it going and save you from buying a new one.
Always start with cleaning and descaling your device before inspecting it for further issues like a damaged O-Ring or a cracked water reservoir. If the problem is part of the internal mechanisms, you can find someone who can take apart and replace these machines, or it may just be time to buy a new Keurig.